

Automation testing has become a part and parcel of our testing @Naukri. With that, we have a complete test suite covering most test cases of the iOS App.
However, the challenge was executing them periodically. One of the major ideas behind having automation suites in place is the fact that it relieves you of the manual intervention. Now! If we had to manually put it to execution, what a snag!
There we had!! Jenkins, an open source CI tool which could execute Apache Ant and Apache Maven based projects as well as arbitrary shell scripts and Windows batch commands as scheduled.
The technology team @ Naukri was on its way to Continuous Integration and as a first step, we scheduled our suites on Jenkins. However, since the steps to create a job on Jenkins for executing the iOS automation suite on a mac (written on Appium) was a little different, putting it down here:
Step by step procedure to create a Jenkins job with Apache Ant and scheduling your Automation suite
Local Configurations:
1. Create a separate user in your local machine and make this user as administrator by which Jenkins server can perform any operation on your local machine.
E.g.: Create separate user with name as “Jenkins”.
2. After creating a Jenkins user, create a root directory for having the selenium code. Jenkins server will check out the updated code from SVN or Git and will put it into this directory. So the hierarchy should be as :
/Users/Jenkins/jenkins_data/workspace/<job name> ……….
3. Go to local directory of your machine to set the folder for jar files. Folder name should be as “Jenkins_Resources”. Every time when job will execute build.xml read the jar files from this directory:
Go to: cd /usr/local directory
Create a folder Jenkins_Resources and put all the jar files in this folder.
4. Download an apache-ant 1.8.1 and paste it in same local directory where you have created your jar files folder:
Go to cd /usr/local
Paste your downloaded apache-ant 1.8.1
5. Export the ant and jars in environment properties file:
Open the terminal and go to cd /Users/Jenkins/env.properties. Click on insert and paste the given directories:
export PATH=$PATH:/usr/local/apache-ant/apache-ant-1.8.1/bin/:/usr/local/bin/
export Common_Resources=/usr/local/Jenkins_Resources
Server Configurations:
1. Login into Jenkins server with your credentials.

2. After successful login click on ‘create a new job’name starts with qa-.(e.g. : qa-iOS-automation)

3. After creating the job, go to configuration section in your job and fill fields.

Fill below fields as:
- Select project name: Project name = qa-ios<Project_Name>-automation
- Set parameter as : execution_type = system and environment = live
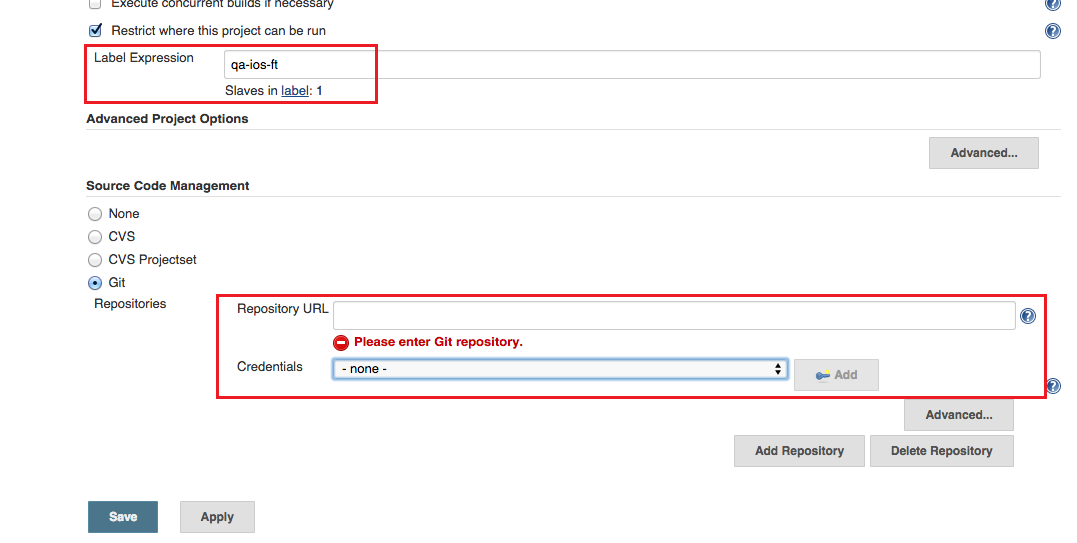
- Enter Label Expression , Eg qa-ios-ft
- Enter your repository URL where the code is committed:
- g. – Repository URL :
- Select ant version as : ant-ios-ft
- Enter ant and jar files path as:
For Mac users:
export PATH=$PATH:/usr/local/apache-ant/apache-ant-1.8.1/bin/:/usr/local/bin/
export Common_Resources=/usr/local/Jenkins_Resources.
For Windows users:
Set Environment variable with Common_Resources as name and set path where the Common Resources folder containing Jars and browser versions are stored.

Select label and enter your repository URL:

You can schedule your build by entering time format as:

Enter the ant version and path from where it executes:
export PATH=$PATH:/usr/local/apache-ant/apache-ant-1.8.1/bin/:/usr/local/bin/
export Common_Resources=/usr/local/Jenkins_Resources.

4. Go to configuration on left panel of Jenkins home page after login and go to configuration settings and fill all fields. You have to set this configuration after setting your node and select node configuration by clicking on configuration panel:

Fill following fields as shown:
For Mac users:
a. Name : <qa-ios-ft>
b. Remote root directory: /Users/Jenkins/jenkins_data.
c. Labels: qa-ios-ft
d. Host : xxx.xxx.xxx.xx (IP address of your Machine)
e. Environment variables : ANT_HOME
f. value : /usr/local/apache-ant/apache-ant-1.8.1/
g. Properties File Path: /Users/Jenkins/env.properties.
h. Click on save.
For Windows users:
a. Name : qa-<jobname>-ft
b. Remote root directory: C:/Jenkins/wprkspace/…..
c. qa-<jobname>-ft
d. Host : xxx.xxx.xxx.xx (As per your Machine)
e. Environment variables : ANT_HOME
f. value : /usr/local/apache-ant/apache-ant-1.8.1/
g. Click on save.

Now select Environment variable and environment properties as:

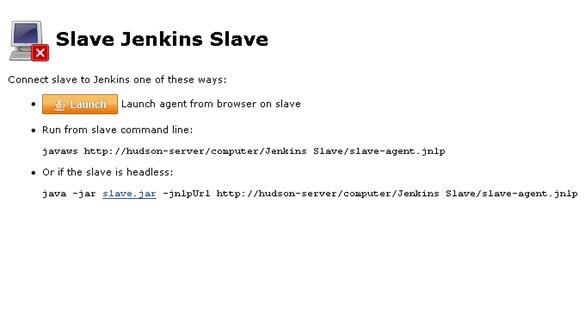
5. After setting the above details launch the slave.
Now your job goes online.
· NOTE: If it gives SSH user is null then the user has to be added (can only be done by Jenkins admin user)
For Mac users:

For Windows users:
A pop up will display and click on ok.
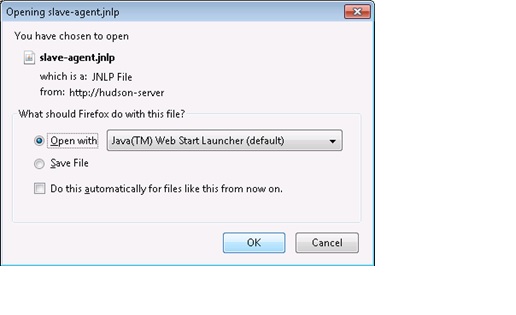
Your connection will set up
6. Go to your job and click on ‘Build with Parameters’ option.

7. Select ‘execution type’, ‘environment’ and click on ‘Build’.

8. Now Jenkins server checks out the selenium code on your local directory (as set by you) and execute the automation code.
9. You can see all the logs on Jenkins server web interface during execution.

Congratulations!! Your job is now set up on Jenkins.
Happy execution…


 The All-New Naukri iOS App (6.0)
What’s up, yeah this post is in fact pleasant and I have learned lot of
things from it concerning blogging. thanks.