

It is quite common for any application to be built and tested in multiple environments like development, test, staging, production etc… And it is typical to have a different set of URLs for each environment. The same holds true for Android applications also.
Ever since we started building Android apps (in Eclipse), managing environments was a tedious but necessary task. In web applications we could easily use symbolic links to separate our environment configurations but it had to be something else in Android apps. A very simple approach is to define an environment variable and change it as desired. It works but brings the following problems along,
-
Manual process of changing environment in code. It is easy to forget to change the variable and accidentally mix them up.
-
Maintain one URL file per environment. Every time during build generation the environment is changed manually which adds an unnecessary dependency and may be risky at times.
-
We never know which environment is the build pointing to.
-
Using this approach we will always have only one version of the app installed on the same device. If we need to test our app on multiple environments at same time, we need multiple devices. Or, we end up switching painfully between different app versions.
-
We use Jenkins to generate builds automatically. With this approach, we either had to create n different Jenkins jobs, one for each environment or write a bunch of scripting in Ant.
As we migrated to Android Studio, we came across a very powerful but less talked about feature of Gradle using which we could create different versions of the same application. Gradle uses product flavors to create different product versions of the app. It also uses build types to apply different build and packaging settings to each product version. Each product flavor and build type combination forms a build variant. The build system thus generates a different APK for each build variant of app.
How to use it?
-
Define all product flavors like production, dev, quality and staging in build.gradle.
-
Define end points, prefixes and any other flavor dependent strings as a “buildconfigfield” in each flavour separately, as shown below,
def final appName = ‘MyApp’
def final myApplicationId = ‘com.example.android’
productFlavors {
production {
applicationId = myApplicationId
buildConfigField ‘String’, ‘HOST’, “\”http://www.example.com\““
buildConfigField ‘String’, ‘URL_PREFIX’, “\”api\”“
resValue “string”, “app_name”, appName
}
dev {
applicationId myApplicationId + “.dev”
buildConfigField “String”, “HOST”, “\”http://dev.example.com\““
buildConfigField ‘String’, ‘URL_PREFIX’, “\”devapi\”“
resValue “string”, “app_name”, appName + “-Dev”
}
quality {
applicationId myApplicationId + “.test”
buildConfigField ‘String’, ‘HOST’, “\”http://test.example.com\““
buildConfigField ‘String’, ‘URL_PREFIX’, “\”testapi\”“
resValue “string”, “app_name”, appName + “-Test”
}
staging {
applicationId myApplicationId + “.staging”
buildConfigField ‘String’, ‘HOST’, ‘”http://staging.example.com“‘
buildConfigField ‘String’, ‘URL_PREFIX’, “\”stagingapi\”“
resValue “string”, “app_name”, appName + “-Staging”
}
-
We create different app names for each flavor by defining a resource value as shown above. It can be accessed as @string/app_name in AndroidManifest.xml file
-
Keep only one URL file where all url’s are prefixed with a variable hostname. During build process, android auto generates a BuildConfig file where all config fields defined in build.gradle for a specific flavor are auto initialized. Hostname can be accessed from this file as below,
public static final String hostname = BuildConfig.HOST
public static final String loginUrl = hostname + “/login”;
-
Use flavor specific build commands to generate a flavored apk. Product flavor along with build type can generate various build variants. By default, debug and release build types are provided. So, the build variants can be, productionDebug, productionRelease, devDebug, devRelease, qualityDebug, qualityRelease, stagingDebug and stagingRelease. If you run the command assembleProductionDebug, it will generate “app-production-debug.apk” instead of “app-debug.apk”. Thus there will be a different apk for each flavor.
-
Since we have same code for all environments, we need only one build creation Jenkins job now. We just need to add one extra parameter for environment name in job configuration.
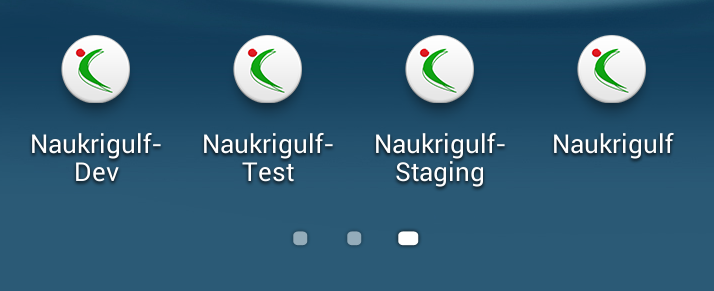
So, we can create environment specific builds and install them on a single device all at the same time,
Thus by using product flavors, we have realized the following benefits,
-
Replaced n Url files (one per environment) with only one.
-
Eliminated manual process of changing environment in code.
-
Replaced n build creation Jenkins jobs (one per environment) with only one.
-
Ability to install multiple builds on one device at the same time. This in itself has advantages, like,
-
Ability to test multiple tags in parallel on one single device.
-
Ability to benchmark multiple builds of the same app on the same device without painful switching.
-
Compare functionality across environments easily.
-
-
As the build now contains only one set of URLs (as per the chosen environment), it fixes the Information Disclosure Vulnerability wherein if a Production build is decompiled, it does not reveal the dev, test and staging Urls.


 The All-New Naukri iOS App (6.0)
Good one! Especially the use of staging/prod build-types in each flavors.
Hi ,
Very nicely explained. I have further some queries regarding the same.
It will be very kind of you if could help me solving those.
I have been able to create build, also with the use of build variants also through android studio.
But I get one build at a time. So When I automate this process though jenkins , do I need to create different jobs for different build like dev, staging , Qa. Or I should create a single job and it will give me all the defined builds inside productFalvours in gradle.
You have mentioned above that one need to need one extra parameter in jenjins while configuring a job. Can you elaborate it.
Regards,
Romit Srivastava
Hi. You can create just one job in Jenkins.
Accept the flavor name as a build parameter. In your job, choose the option ‘This build is parametrized’. When you choose this, pick ‘String parameter’ from ‘Add Parameter’ menu. Specify the parameter name, say ‘flavor’ and specify a default value, say ‘production’. If you are creating builds via Shell option in Jenkins, just update the command to be ./gradlew assemble$flavor”debug”. Save the job.
Now in Jenkins you will see an option ‘Build with Parameters’. Click and provide the flavor name (dev/quality/production/staging). That’s it. The job will create builds as per the provided flavor name.